
The OBD2 ELM327 scanner is a valuable tool for diagnosing car problems. This guide provides a step-by-step approach on how to use this device with your Android phone or tablet. We’ll cover installing the necessary software, connecting the scanner to your car, and using the Torque app to interpret the data.
Installing the Torque App
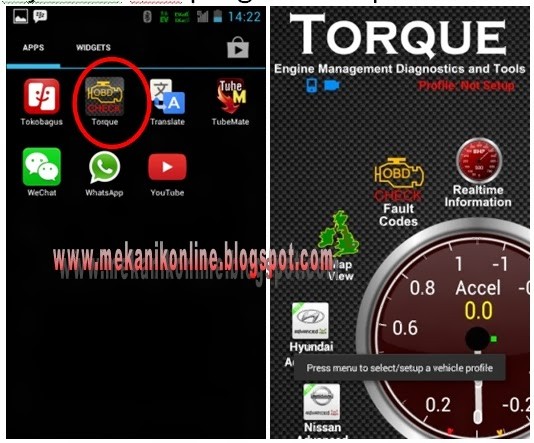
First, you’ll need to install the Torque app on your Android device.
- Obtain the Software: The software, typically named “DashCommand” and “Torque” (.apk files), can be acquired via email, CD, or flash drive. These are usually pro versions. Trial versions are often available on app stores.
- Copy and Install: Copy the .apk file to your Android device’s memory card. Locate the file using a file manager and install it. Follow the on-screen instructions.
- Installation Order: It’s recommended to install Torque first before any other OBD2 software. Once you understand Torque’s connection settings, you can install other provided programs like DashCommand and IOBD.
- Confirmation: A successful installation will result in a Torque icon appearing on your Android device’s screen.
Connecting the ELM327 to Your Car
Next, connect the OBD2 ELM327 Bluetooth scanner to your vehicle.
- Locate the OBD2 Port: Find the OBD2 port in your car (typically under the dashboard on the driver’s side). Vehicles from 1996 onwards usually have this port.
- Connect the Scanner: Plug the OBD2 scanner into the port. The scanner’s power light should illuminate. If not, ensure it’s properly inserted.
- Turn on the Ignition: Turn the ignition key to the “on” position or start the engine.
- Activate Bluetooth: Enable Bluetooth on your Android device.
- Scan for Devices: Scan for Bluetooth devices until you find one named “OBD II” or “OBD2 ECU.”
- Connect and Enter Passkey: Select the device and connect. If prompted for a passkey, enter “1234” or “0000.” Some devices may auto-pair. A successful connection will show “paired” or “paired but not connected.”
- Return to Home Screen: Go back to your device’s home screen.
Using the Torque App
Finally, let’s use the Torque app to access vehicle data.
- Launch Torque: Open the Torque app.
- Initial Setup: For the initial setup, navigate to “Settings” > “OBD2 Adapter Settings” > “Choose Bluetooth Device” and select the connected OBD2 device (OBD2 ECU/OBD II). This step is crucial for the first run.
- Check Connection Status: Confirm the connection by tapping “Adapter Status.” A checkmark with “OK” indicates a successful connection to the ECU.
- Begin Diagnostics: With the Bluetooth, adapter, and ECU showing “OK,” the app is ready to diagnose your vehicle.
- Customize Display: Long-press on an empty area of the screen to customize the displayed information.
By following these steps, you can effectively utilize the OBD2 ELM327 scanner and the Torque app to monitor and diagnose your vehicle’s performance. If you encounter issues with other OBD2 software, consult the software’s documentation or contact the provider.