It’s a situation every car owner dreads: the sudden illumination of the check engine light. Your dashboard warning lights up, signaling potential trouble under the hood. While this light can indicate a range of issues, from minor to severe, the first step to understanding the problem is retrieving the diagnostic trouble codes (DTCs) stored in your vehicle’s computer. Instead of immediately heading to a mechanic and facing potentially costly diagnostic fees, did you know you could borrow a professional car scanner and check it yourself, for free?
This guide will walk you through the process of borrowing a car scanner, also known as an OBD-II scanner or scan tool, from automotive parts retailers like AutoZone (and similar programs may be available at other stores). Using these loaner tools can empower you to understand your car’s health and make informed decisions about repairs. Let’s dive into how you can leverage this service to diagnose your check engine light and get back on the road with confidence.
Step-by-Step Guide to Using a Loaner Car Scanner
Diagnosing your check engine light using a borrowed scan tool is a straightforward process. Follow these steps to effectively retrieve your vehicle’s diagnostic codes:
1. Preparation is Key
Before you get started, ensure your vehicle is safely parked and completely turned off. It’s crucial to engage the parking brake and ensure the car is not in gear. Safety first! If you are at all uncertain about any step in this process, don’t hesitate to ask for assistance from the store employee when you borrow the scan tool. They are there to help guide you.
2. Borrowing Your Professional Grade Scan Tool
Head to your local automotive parts store and inquire about their loaner tool program. Specifically, ask if you can borrow a professional car scanner to diagnose a check engine light. These tools are often available for free loan with a refundable deposit. Once you have the scan tool, you’ll want to locate your vehicle’s Data Link Connector (DLC). This is the port where you’ll plug in the scanner. The DLC is typically found under the dashboard on the driver’s side. It’s often near the steering column but can vary slightly depending on your car’s make and model. If you’re unsure of the exact location, your vehicle’s owner’s manual is a great resource, or a quick online search for “[your car make and model] OBD2 port location” will usually provide the answer.
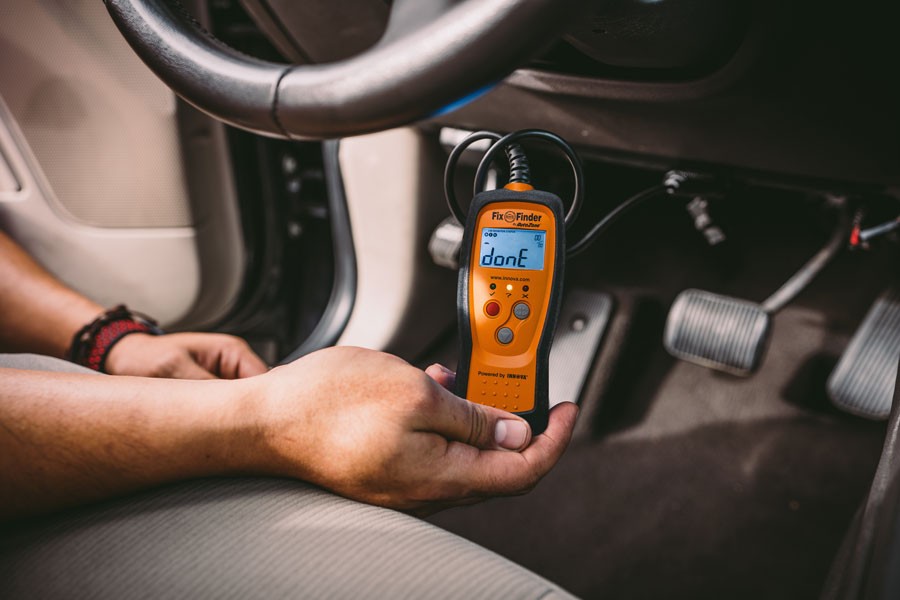 OBD-II scanner done reading trouble codes
Using a professional car scanner to diagnose vehicle issues.
3. Connecting and Scanning for Diagnostic Trouble Codes
With the scan tool in hand and the DLC located, it’s time to connect them. The connector on the scan tool is designed to fit the DLC in only one direction, so you won’t be able to plug it in incorrectly. Gently insert the scan tool connector into the DLC until it’s firmly seated.
Next, turn your vehicle’s ignition to the “ON” position. This means turning the key so that the dashboard lights illuminate, but without actually starting the engine. The scan tool will need power to operate, and this position provides that power.
Once powered on, the scan tool will initiate communication with your vehicle’s computer. Depending on the specific model of scan tool you’ve borrowed, you may need to navigate a simple menu on its LCD screen. Look for options like “Read Codes” or “Diagnostic Scan.” Follow the on-screen prompts. The tool will then begin scanning your vehicle’s systems for any stored diagnostic trouble codes. This process usually takes just a few moments. You’ll typically see a “Reading…” or “Scanning…” message followed by a “Done” indication on the scanner’s display.
4. Retrieving Your Diagnostic Report and Understanding the Codes
Once the scan is complete and the tool displays “Done,” disconnect the scan tool from the DLC and turn your vehicle’s ignition off. Now, it’s time to return to the automotive parts store with the borrowed scan tool.
Inform the store employee that you’ve completed a scan and provide them with your vehicle’s information. This will typically include the year, make, model, and engine size (if you know it). The employee will use a terminal in the store to retrieve the diagnostic report from the scan tool. They can then explain the meaning of the codes to you and provide a printed copy of the report for your records. This is a crucial step, as understanding the codes is key to diagnosing the issue. The store employee can also offer potential solutions and recommend parts if needed.
5. Troubleshooting Common Scan Tool Issues
While using a loaner car scanner is generally easy, you might encounter a couple of common issues:
- Blank LCD Screen: If the scan tool’s screen remains blank when connected, it usually indicates a lack of power at the DLC. Check your vehicle’s fuse panel for any blown fuses related to the diagnostic system or the PCM (Powertrain Control Module). Your vehicle’s repair manual can help you locate the correct fuses. Replacing a blown fuse might solve the problem. If fuses are not the issue, consult a repair professional.
- No Codes Found: If the scan tool reports “No codes found” but your check engine light is still on, it could indicate a manufacturer-specific issue that the generic scan tool might not detect. In these cases, a dealership-level diagnostic scan might be necessary. It’s also possible that the issue is intermittent and the code is pending or has cleared, but the light hasn’t reset yet.
- Connector Fit Issues: If you’re unable to connect the scan tool to the DLC, it’s possible your vehicle is older and predates the standardized OBD-II protocol. Vehicles manufactured before 1996 may use different diagnostic systems. In this case, a different type of tester might be required, or the loaner tool program may not be compatible with your vehicle.
Understanding Scan Tool Indicator Lights
Many scan tools come equipped with indicator lights that provide a quick visual assessment of your vehicle’s system status. These lights are typically Green, Yellow, and Red LEDs and offer a simplified way to interpret the scan results.
- Green LED (checkmark): A green light indicates that all engine systems are currently operating within normal parameters. All monitors are active, performing diagnostic tests, and no diagnostic trouble codes (DTCs) are present. This is the ideal scenario!
- Yellow LED (question mark): A yellow light suggests that some of the vehicle’s monitors haven’t yet completed their diagnostic self-testing, or there’s a “pending” DTC in the system. A pending code means a potential issue has been detected but hasn’t yet triggered the check engine light to stay on permanently. In this case, completing a full drive cycle (driving under various conditions) might allow all monitors to run their tests. After driving, you can try rescanning to see if the yellow light clears or if a red light appears.
- Red LED (X): A red light signals a problem within one or more of your vehicle’s systems. It confirms the presence of one or more Diagnostic Trouble Codes (DTCs). When the red LED is illuminated, the check engine light on your dashboard will typically be steadily lit. This indicates that further investigation and likely repairs are needed.
Remember, these indicator lights are a quick visual aid. Always rely on the detailed diagnostic report provided by the store employee for a complete understanding of the issue.
Conclusion: Empowering Yourself with Free Diagnostic Tools
Borrowing a professional car scanner is an excellent way to take the first step in understanding your vehicle’s check engine light. It provides you with valuable information, often for free, empowering you to discuss potential repairs with mechanics more knowledgeably or even tackle simple fixes yourself. By understanding how to borrow a professional car scanner and interpret the basic diagnostic information, you can save time and money while staying informed about your car’s health.
For further guides on car maintenance, troubleshooting, and repair tips, explore more articles and resources here at carw.store. We’re dedicated to providing you with the information you need to keep your vehicle running smoothly and efficiently.