The Volkswagen Golf Mk4 R32, a legendary hot hatch, is known for its powerful VR6 engine and all-wheel-drive system. Maintaining this performance icon requires occasional repairs, and one common job is replacing the front axles. This guide provides a step-by-step walkthrough of the process, perfect for MK4 R32 owners looking to tackle this repair themselves.
A greasy driver’s side axle connection to the differential indicates a torn CV boot.
This project details the replacement of front axles on a 2004 VW Golf MK4 R32 with 136,000 miles. Torn CV boots on both driver and passenger sides necessitated the replacement, with the driver’s side exhibiting more severe damage and grease leakage. While individual boot or CV joint replacement is possible, opting for complete axle assemblies simplifies the process.
High-quality replacement axles from Raxles were chosen for this project. Their reputation for superior quality compared to remanufactured alternatives makes them a popular choice within the MK4 R32 community.
MK4 R32 Axle Removal
Safety first: Ensure the vehicle is securely supported on jack stands and on level ground. Engage the handbrake and chock the rear wheels. Place the car in neutral to allow free rotation of the front wheels.
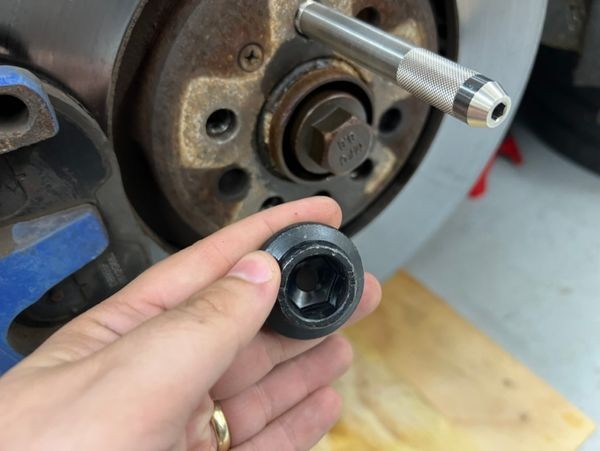
- Axle Nut Removal: Penetrating oil is crucial for loosening the axle nut, likely a 27mm 6-point or a 30mm 12-point depending on the specific vehicle. Significant force, potentially requiring a breaker bar, might be necessary.
- Securing the Rotor: To prevent the hub from spinning during bolt removal, wedge a screwdriver into the rotor vents. This technique will be useful throughout the process.
Using a screwdriver to prevent rotor spin while working on the MK4 R32 axle.
-
Axle Bolt Removal: Remove the bolts securing the axle to the transmission. These typically require a 12mm triple square bit, while the new Raxles hardware might use a 10mm.
-
Control Arm Disconnection: Disconnect the control arm from the ball joint by removing the three 13mm bolts. Penetrating oil and a breaker bar may be required due to potential corrosion. Once the bolts are out, push down on the control arm and pry it out of the way.
The control arm disconnected, allowing for easier axle removal on the MK4 R32.
- Axle Separation: Gently tap the axle out of the wheel hub using a dead blow mallet. Disconnecting the transmission side should be relatively straightforward. The passenger side axle connection might require extensions to reach the bolts without interference.
MK4 R32 Axle Installation
Installation is largely the reverse of removal, with a few key considerations:
- Remove Shipping Plug: Raxles axles include a small black plastic plug that must be removed from the axle end before installing the axle nut.
- Careful Alignment: Ensure proper spline alignment in both the wheel hub and transmission to avoid damage. Gradually tighten the transmission-side bolts in a star pattern to the specified torque (59 ft/lb). Marking tightened bolts with a paint pen can help track progress.
Using a paint pen to mark tightened bolts ensures proper torque application on the MK4 R32.
- Clean Up: Thoroughly clean any residual grease from engine components and wheels.
Cleaning the wheel hubs after MK4 R32 axle replacement.
- Final Torque and Alignment: After lowering the vehicle, torque the axle nut to the manufacturer’s specification. A wheel alignment is strongly recommended after this procedure.
Conclusion
Replacing the front axles on a MK4 R32 is a manageable DIY project for enthusiasts with basic mechanical skills. While seemingly daunting, the process is straightforward when approached methodically. This repair ensures the continued performance and reliability of this iconic hot hatch. Remember to consult a professional if you encounter any difficulties.