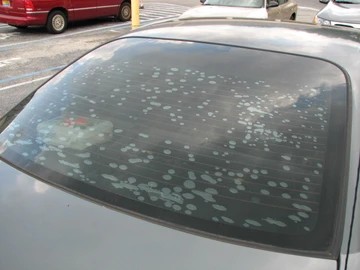
Removing old, bubbling window tint from your rear windshield can feel like a daunting task. Peeling it off often leaves a sticky residue that’s difficult to remove and risks damaging the defroster lines. This guide provides step-by-step instructions on How To Remove Rear Window Tint effectively while minimizing the risk of damage. Should you decide the task is too challenging, professional window tint removal services are always an option.
Assessing the Situation: DIY or Professional Help?
Before starting, consider the age and condition of the tint. Older, delaminated film is more likely to adhere strongly to the defroster lines, increasing the risk of damage during removal. While professional tinters can’t guarantee the defroster’s safety, their experience and specialized tools significantly reduce the risk. Weigh the potential for damage against your comfort level with this challenging task. If you’re unsure, seeking professional help might be the wisest decision.
The Sun and Ammonia Method: A Step-by-Step Guide
This method utilizes the sun’s heat to soften the tint adhesive, making it easier to peel. It’s crucial to perform this on a sunny day for optimal results. Alternative techniques are recommended for cloudy weather.
Step 1: Prepare the Window: Clean the exterior window with soapy water and apply a black garbage bag cut to roughly the window’s shape. Smooth out any wrinkles to ensure good contact. This will help trap heat against the glass.
Step 2: Apply Ammonia Solution: Protect the car’s interior with a tarp, covering speakers, rear lights, and upholstery. Wearing a face mask, mix equal parts ammonia and water in a spray bottle. Remember, ammonia fumes are strong, so ensure adequate ventilation. Liberally spray the inside of the window with the ammonia solution.
Step 3: Trap the Ammonia: Immediately place a second black garbage bag over the ammonia-soaked tint, trapping the solution and heat against the glass. The sun’s heat will intensify the ammonia’s effect on the adhesive. Leave this in place for a sufficient amount of time depending on the sun’s intensity.
Step 4: Peel the Tint: Carefully lift a corner of the tint with a razor blade or your fingernail. Attempt to peel the entire sheet off in one piece, pulling slowly and evenly. Keep the tint moist with ammonia as you peel. Exercise caution around the defroster lines to avoid damage.
Step 5: Remove Residue: Use a razor blade to scrape off any remaining tint fragments. Clean any residual adhesive with ammonia and very fine steel wool. Wipe the window clean with a paper towel before the ammonia dries, then remove the exterior garbage bag and wash the window thoroughly with glass cleaner.
Conclusion
Removing rear window tint can be a DIY project, but it requires patience and careful execution. The sun and ammonia method offers an effective approach, but remember to prioritize safety and consider professional help if needed. Successfully removing old tint will leave you with a clear view and a sense of accomplishment.