That pesky check engine light. It’s a symbol that can induce a mix of annoyance and anxiety in any car owner. Seeing that light illuminate on your dashboard often feels like your car is trying to speak a language you don’t understand, hinting at problems both big and small. While sometimes these warnings necessitate a trip to a professional mechanic, many times the issue might be minor, or something you can understand and even resolve yourself. Wouldn’t it be convenient to decipher these car codes and even clear them yourself, especially for those less serious instances?
Luckily, there’s a tool designed precisely for this purpose: the OBD-II scanner. These handy devices empower you to understand what your car is trying to tell you and, importantly, to clear codes on your car with a scanner. This guide will walk you through the process, step-by-step, helping you take control of your car’s diagnostics and potentially save yourself time and money on unnecessary mechanic visits.
Understanding Car Codes and OBD-II Scanners
Modern vehicles are equipped with sophisticated onboard computer systems that monitor various aspects of their operation. When these systems detect an issue, they generate error codes, also known as Diagnostic Trouble Codes (DTCs). These codes are your car’s way of flagging that something isn’t quite right, whether it’s a loose gas cap or a more significant mechanical problem. The check engine light, or malfunction indicator lamp (MIL), is often the visual signal that a code has been stored.
So, how do you access and understand these codes? That’s where the On-Board Diagnostics II (OBD-II) scanner comes in. Since 1996, OBD-II has been a standardized system in virtually all cars sold in the United States, and subsequently, in many other countries. An OBD-II scanner, or car scanner, is a device that plugs into your car’s OBD-II port, typically located under the dashboard on the driver’s side. This port acts as a communication gateway, allowing the scanner to retrieve the stored diagnostic codes from your car’s computer.
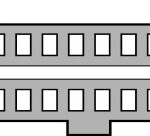
Alt text: Locating the OBD-II port underneath the driver’s side dashboard of a car, a trapezoid-shaped 16-pin connector for car diagnostics.
Using an OBD-II scanner to clear codes on your car offers several benefits:
- Diagnostic Insight: It allows you to read and understand the error codes, giving you a clearer picture of potential issues.
- DIY Troubleshooting: For minor issues, clearing the code after addressing the problem might be all that’s needed, saving you a trip to the mechanic.
- Cost Savings: By identifying and potentially resolving minor issues yourself, you can avoid unnecessary diagnostic fees at a repair shop.
- Informed Mechanic Visits: Even if professional repair is required, knowing the error code beforehand can help you communicate more effectively with your mechanic.
Step-by-Step Guide: How to Clear Codes on Your Car with a Scanner
Clearing codes with an OBD-II scanner is a straightforward process. Here’s a detailed guide:
Step 1: Prepare Your Scanner and Car
First, you’ll need an OBD-II scanner. These are readily available online and in auto parts stores, ranging from basic, budget-friendly models to more advanced professional-grade tools. Ensure your car is parked in a safe location and the ignition is turned completely off.
Next, locate the OBD-II port in your vehicle. As mentioned, it’s most commonly found under the dashboard on the driver’s side. It’s a 16-pin, trapezoid-shaped connector. In some vehicles, it might be located under the passenger side dashboard or in the center console, but your car’s manual will pinpoint its exact location if you have trouble finding it.
Step 2: Connect the OBD-II Scanner
Take your OBD-II scanner and gently but firmly plug its male connector into the OBD-II port in your car. Ensure it’s securely connected.
Alt text: Connecting an ANCEL DS700 OBD2 scanner to a car’s OBD-II port located under the dashboard, initiating car diagnostic process.
Once connected, cycle your car’s ignition to the “ON” position. This means turning the key to the point where the dashboard lights illuminate, but without starting the engine. This provides power to the OBD-II port and your scanner.
Step 3: Navigate the Scanner Menu
Your OBD-II scanner will power up and begin its booting sequence. Follow the on-screen instructions provided by your scanner. Most scanners will automatically attempt to connect to your vehicle’s computer.
Once connected, you’ll typically see a menu with various options. Look for options like “Read Codes,” “Diagnostic Codes,” or similar wording. Select this option to initiate a scan of your vehicle’s system. The scanner will then retrieve and display any stored diagnostic trouble codes.
Step 4: Understand the Codes (Optional but Recommended)
After reading the codes, your scanner will display a series of alphanumeric codes. These are the DTCs. While you can proceed to clear codes directly, it’s always a good idea to understand what these codes mean.
You can note down the codes and then:
- Consult your car’s repair manual: Your vehicle’s manual might list common codes and their meanings.
- Use an online OBD-II code database: Websites like OBD-Codes.com or similar resources allow you to enter the code and get a description of the potential issue.
- Use a scanner with built-in code definitions: Some advanced scanners provide code definitions directly on their display, making it easier to understand the problem.
Understanding the code helps you determine the severity of the issue. For example, a code related to a loose gas cap is much less concerning than a code indicating a transmission problem.
Step 5: Clear the Codes
Once you’ve read and ideally understood the codes, navigate the scanner menu again to find the “Erase Codes,” “Clear Codes,” or a similarly labeled option. Select this function.
The scanner will likely ask you to confirm if you want to clear the codes. Be certain you want to clear them before proceeding. If you are confident you’ve addressed the underlying issue (for example, you tightened a loose gas cap), then confirm the action.
After confirmation, the scanner will send a command to your car’s computer to clear the stored codes. If successful, the check engine light on your dashboard should turn off.
Step 6: Verify and Monitor
Clearing the code doesn’t magically fix the underlying problem if one exists. It only turns off the warning light. If the issue persists, the check engine light will likely reappear after some driving, as the system re-detects the fault.
After clearing the codes:
- Start your engine and let the car idle for a few minutes.
- Take a short test drive.
- Rescan for codes: Use your scanner again to see if any codes have returned.
If the check engine light stays off and no codes reappear, the issue might have been minor or intermittent. However, if the light comes back on, or if you know the issue is more serious, it’s crucial to have your vehicle inspected and repaired by a qualified mechanic.
Beyond Clearing Codes: Other Useful Scanner Features
Many OBD-II scanners offer features beyond just reading and clearing codes, which can be valuable for car maintenance:
- Live Data: This feature allows you to view real-time data from your car’s sensors as you drive or while the engine is running. This can be incredibly useful for diagnosing intermittent problems or monitoring engine performance. You can see readings for things like engine temperature, RPM, oxygen sensor voltage, and more.
- Freeze Frame Data: When a DTC is stored, the system often records a “snapshot” of sensor readings at the moment the fault occurred. This “freeze frame” data can provide valuable context and clues when diagnosing the problem.
Choosing the Right OBD-II Scanner
The market offers a wide range of OBD-II scanners. When choosing one, consider:
- Budget: Basic scanners are very affordable, while advanced models with more features can be pricier.
- Features: Decide what features are important to you. Do you need live data, freeze frame, or advanced diagnostic capabilities?
- Ease of Use: Look for a scanner with a user-friendly interface and clear instructions.
- Compatibility: While OBD-II is standardized, some scanners might have better compatibility with certain makes and models or offer vehicle-specific diagnostics.
For basic code reading and clearing, a simple, inexpensive scanner will suffice. For more in-depth diagnostics and features like live data, you might consider investing in a more advanced model.
Important Considerations and Cautions
While OBD-II scanners are powerful tools, it’s crucial to use them responsibly:
- Clearing codes is not a fix: It only hides the symptom (the warning light). Always investigate and address the underlying cause of the problem.
- Don’t clear codes indiscriminately: Clearing codes without understanding them can make it harder for a mechanic to diagnose issues later if the problem persists.
- Some codes should not be cleared immediately: For example, emissions-related codes might need to be addressed before a vehicle can pass an inspection.
- Safety First: Always operate your scanner safely and follow the manufacturer’s instructions. Never operate a scanner while driving.
- Know your limits: For complex or serious car problems, always consult a qualified mechanic. OBD-II scanners are tools for preliminary diagnostics and minor issues, not replacements for professional expertise.
Conclusion
Knowing how to clear codes on your car with a scanner is a valuable skill for any car owner. It empowers you to understand your vehicle better, address minor issues yourself, and be more informed when dealing with car repairs. While it’s not a substitute for professional mechanical expertise, an OBD-II scanner is an indispensable tool for modern car maintenance and can save you both time and money in the long run. Consider adding one to your car maintenance toolkit and take control of your car’s diagnostic journey.
FAQs
What is an OBD-II scanner used for?
An OBD-II scanner is used to communicate with your car’s onboard computer system, primarily to read Diagnostic Trouble Codes (DTCs) that indicate vehicle malfunctions. It helps in diagnosing car problems and monitoring vehicle health.
How do you clear codes using an OBD-II scanner?
To clear codes, plug the scanner into the OBD-II port, turn the ignition to the “ON” position (engine off), navigate to the “Erase Codes” or “Clear Codes” option in the scanner menu, and confirm the action.
Is it safe to clear car codes myself?
Yes, it is generally safe to clear car codes yourself using an OBD-II scanner. However, it’s crucial to understand that clearing codes only turns off the warning light and doesn’t fix the underlying problem. Always investigate and address the cause of the code. If you are unsure about the issue or if the warning light reappears, consult a mechanic.


