
The Epson L220 is a popular multifunction printer known for its printing, scanning, and copying capabilities. To unlock these features, you need to install the correct driver on your computer. This guide provides a comprehensive walkthrough on how to install the Epson L220 scanner driver, ensuring you can seamlessly digitize your documents.
 Epson L220 Driver Installation
Downloading the Epson L220 Driver
Before installation, you need to download the appropriate driver for your operating system. While a CD might have been included with your printer, it’s often easier and more reliable to download the latest version directly from the official Epson website. This ensures you have the most up-to-date features and bug fixes. Search for “Epson L220 driver” and select your operating system (Windows, macOS, etc.) to download the correct package.
| Driver Name | L220 x86 x64 224JAUsHomeExportAsiaML |
|---|---|
| Version | 7.9.6ID |
| Supported OS | Windows 7, 8, 8.1, 10, 11 (32bit/64bit) |
| Printer Driver Download | 32 bit | 64 bit |
| Scanner Driver Download | 32 & 64 bit |
Installing the Epson L220 Scanner Driver
Once the driver package is downloaded, follow these steps to install it:
- Locate the downloaded file: Typically found in your “Downloads” folder.
- Extract the files: If the download is compressed (e.g., .zip or .exe), extract the contents to a new folder.
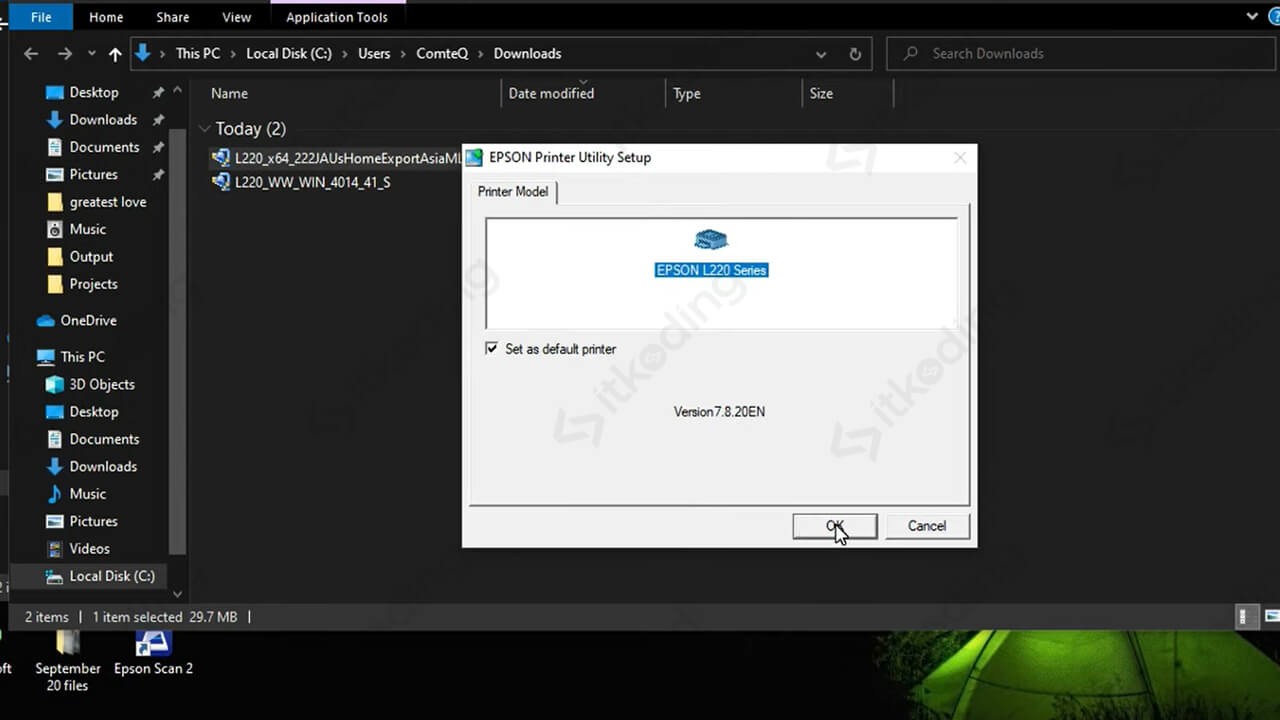
- Run the setup file: Double-click the installer file (usually named “setup.exe” or similar).
- Follow the on-screen instructions: The installation wizard will guide you through the process.
- Connect the printer: When prompted, connect your Epson L220 printer to your computer using a USB cable.
- Select “Set as default printer” (optional): If you want the L220 to be your primary printer.
- Choose your preferred language.
- Accept the license agreement.
- Select connection type: Choose the appropriate connection method (usually USB). The installer may automatically detect the printer. If not, you might need to select the correct USB port manually.
- Complete the installation: Wait for the installation process to finish. You might need to restart your computer.
Verifying the Installation
After installation, verify that the scanner driver is working correctly:
- Open the Epson Scan application: This software should be installed along with the driver. You can find it in your Start Menu or Applications folder.
- Place a document on the scanner bed.
- Initiate a scan: Click the “Scan” or “Preview” button in the Epson Scan software. This should activate the scanner and display a preview of your document.
Troubleshooting
If you encounter issues during installation or scanning:
- Check your USB connection: Ensure the cable is securely connected to both the printer and computer.
- Restart your computer: This can resolve temporary software conflicts.
- Reinstall the driver: Uninstall the existing driver and try reinstalling it from the downloaded package.
- Consult Epson support: Visit the official Epson website for troubleshooting guides and contact information.
Conclusion
Installing the Epson L220 scanner driver is a straightforward process that allows you to utilize the full functionality of your multifunction printer. By following these steps and addressing any potential issues, you can efficiently scan documents and integrate them into your digital workflow. Remember to always download drivers from official sources to ensure security and compatibility.