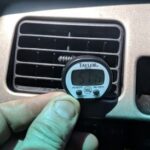
Replacing a clogged heater core on a 2013 Passat TDI might seem daunting, but it’s a surprisingly manageable DIY project. This guide provides a step-by-step walkthrough, making the process accessible even for those with moderate mechanical skills. This specific example uses a 2012 Passat with similar design and procedures applicable to the 2013 model year. The clogged heater core symptoms were evident with poor heat output.
Identifying a Clogged Heater Core in Your Passat TDI
A telltale sign of a failing heater core is weak or no heat despite a functioning engine cooling system. In this 2012 Passat TDI, the issue presented as insufficient heat output. Upon inspection, the old heater core revealed a thick white buildup inside the tubes and tank, indicating significant clogging. This buildup restricts coolant flow, preventing the heater core from effectively transferring heat to the cabin. Discoloration of the coolant lines compared to new ones further confirmed the diagnosis.
Parts and Tools Needed for the Job
Before starting, gather the necessary parts and tools. You’ll need a new heater core (part number 561819031B is referenced for the 2012 model, verify fitment for your 2013 Passat TDI), a set of seals and clamps (part number 561898380), basic hand tools including Torx drivers, a drain pan, coolant, rags, and a small container to catch spilled coolant. A rubber mallet and small piece of wood can be helpful for seating the new core.
Step-by-Step Heater Core Replacement Procedure
-
Prepare the Vehicle: Drain the engine coolant. Accessing the block heater drain plug simplifies this process compared to disconnecting coolant hoses at the firewall.
-
Interior Disassembly: Remove the trim panel below the steering wheel. It’s secured by a Torx screw and then drops down. Next, remove the storage compartment by pushing in on the sides to release the tabs. This provides access to the screws securing the under-dash panel. Remove the under-dash panel, disconnecting the data link connector and foot vent. Finally, remove the panel covering the heater core, held in place by four screws.
-
Heater Core Removal: Loosen the 6mm screw located between the heater core lines under the hood. This screw is recessed in a hole and can be difficult to access. Disconnect the heater core hoses. This is often the most challenging step, as the connections can be tight. With the hoses disconnected, the old heater core pulls straight out.
-
Heater Core Installation: Install the new heater core, ensuring the o-rings are properly seated and lubricated to prevent damage. Reconnect the hoses, taking care to fully seat the flanges. Pushing firmly on the hose connections under the hood and gently tapping with a rubber mallet can help achieve a proper seal. Tighten the 6mm screw under the hood.
-
Reassembly: Reinstall all interior panels and components in reverse order of removal.
-
Final Steps: Refill the cooling system with the correct G12 coolant. Perform a thorough leak check with the engine running before fully reassembling the interior.
Conclusion
Replacing the heater core on a 2013 Passat TDI is a labor-intensive but achievable DIY project. This guide, leveraging a similar experience on a 2012 model, offers valuable insights and step-by-step instructions to navigate the process successfully. By following these steps carefully and taking necessary precautions, you can restore heat to your Passat TDI and enjoy a warm and comfortable cabin. Remember to consult your vehicle’s specific repair manual for detailed instructions and torque specifications.

