
Previously, we discussed how to install the Epson L360 printer driver without a CD. Now, we will delve into another essential aspect of the Epson L360: its scanning capabilities. This guide will cover:
- How to install the Epson L360 scanner driver
- How to scan using the Epson L360 printer
The Epson L360 printer is equipped with an integrated ink tank system, designed for efficient ink management using ink number 664. This ink series is compatible with a wide range of Epson printers, including:
- Epson L100
- Epson L110
- Epson L120
- Epson L200
- Epson L210
- Epson L220
- Epson L300
- Epson L310
- Epson L350
- Epson L355
- Epson L360
- Epson L365
- Epson L380
- Epson L405
- Epson L485
- Epson L550
- Epson L555
- Epson L565
- Epson L1300
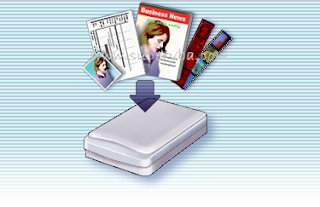
The Epson L360 is a versatile all-in-one device offering printing, photocopying, and scanning functionalities. To enable scanning, it’s crucial to install the Epson L360 scanner driver. It’s important to note that the scanner driver is not automatically installed when you install the printer driver. Epson provides separate driver packages for printing and scanning functions for the L360 model.
Epson L360 printer highlighting its scanning capability.
Step-by-Step Guide to Install the Epson L360 Scanner Driver
Follow these straightforward steps to install your Epson L360 scanner driver:
-
Locate the Scanner Driver Setup File: Begin by opening the Epson L360 scanner driver file. If you haven’t downloaded it yet, you can download the Epson L360 scanner driver from a reliable source.
-
Run the Setup Application: Double-click on the “Setup” file (Application) to initiate the installation process.
Initiating the Epson L360 scanner driver installation by running the setup application.
-
Proceed with Installation: In the installation window, click “Next” to continue the setup.
-
Accept License Agreement: In the Software License Agreement window, check the box next to “I Accept the terms and conditions of the agreement” to agree to the terms and proceed.
-
Wait for Installation Completion: Allow the installation process to complete. This may take a few minutes.
-
Finalize Installation: Once you see the message “Epson Scan was successfully installed“, click “Finish“. At this point, the scanner application is successfully installed on your computer.
-
Connect the USB Cable: Now, turn on your Epson L360 printer by pressing the Power button.
-
Connect to Your Computer: Connect the printer’s USB cable to a USB port on your PC or laptop. Wait for the USB driver installation to finish. A successful USB driver installation is indicated by the message “Device driver software installed successfully“.
Congratulations! You have successfully installed the Epson L360 scanner driver, and your scanner is now ready for use.
How to Scan Documents with the Epson L360 Scanner
With the Epson L360 scanner driver properly installed, you can now start scanning your documents. Here’s how:
-
Open the Epson Scan Application: Launch the Epson Scan application. You can typically find the Epson Scan icon on your computer desktop or in the applications menu.
-
Configure Scan Settings: Initially, the scan mode might be set to “Full Auto Mode“. For more control, change the mode to “Office Mode” or another suitable option. Adjust settings according to your needs, such as paper size, file format (JPEG, PDF, etc.), and filename.
Epson Scan application interface showing scan settings and options.
-
Preview the Scan: Click “Preview” to get a preview of the scanned image before the final scan. This allows you to check the document alignment and settings.
-
Initiate the Scan: Click “Scan” to start the scanning process. Once completed, your scanned file will be saved in the default folder, typically “My Pictures” or “Documents” in your C drive.
You have now successfully installed the Epson L360 scanner driver and performed your first scan. We hope this guide has been helpful. Thank you.