Experiencing problems with your Mac and suspecting a hardware malfunction? Apple Diagnostics, previously known as Apple Hardware Test, is a built-in utility designed to identify potential hardware issues on your Mac. This guide will walk you through how to use this powerful tool to diagnose your Mac, understand the results, and explore your next steps.
Getting Your Mac Ready for Diagnostics
Before running Apple Diagnostics, ensure your Mac is properly prepared for the test. This will help ensure accurate results and a smooth process.
- Software Update Check: It’s always a good practice to have the latest macOS updates installed. If possible, install the latest macOS updates before running diagnostics. This can resolve software-related issues that might be mistaken for hardware problems.
- Power Down: Completely shut down your Mac. A full shutdown ensures a clean state for the diagnostic test.
- Disconnect Peripherals: Unplug all external devices from your Mac. This includes printers, USB drives, external hard drives, and any other accessories. Keep only the essential peripherals connected: keyboard, mouse, display, Ethernet cable (if you use a wired connection), and the power adapter. This step isolates potential hardware conflicts and focuses the diagnostics on the core Mac components.
- Stable Surface and Ventilation: Place your Mac on a hard, flat, and stable surface. Ensure it has good ventilation around it. This prevents overheating during the diagnostic process and ensures accurate readings.
Starting Apple Diagnostics on Your Mac
The process to start Apple Diagnostics differs slightly depending on whether your Mac uses Apple silicon or an Intel processor. Determine your Mac’s processor type and follow the corresponding steps below. If you’re unsure, you can usually find this information in the ‘About This Mac’ section under the Apple menu.
For Macs with Apple Silicon
- Power Button Hold: Press and hold the power button on your Mac. For Mac laptops with Touch ID, press and hold the Touch ID button.
- Startup Options: Continue holding the power button. Your Mac will power on and load the startup options screen. You’ll know you’re in the right place when you see the “Options” label appear on screen. Once you see “Options”, release the power button.
- Command-D: Press and hold the Command (⌘) and D keys simultaneously on your keyboard. This command initiates the Apple Diagnostics process on Apple silicon Macs.
For Intel Processor-Based Macs
- Power On and D Key: Turn on your Mac and immediately press and hold the D key on your keyboard as it starts up. Timing is crucial here – press the D key right after pressing the power button.
- Release D Key: Release the D key when you see either a progress bar appear on the screen or when you are prompted to choose your preferred language. This indicates that Apple Diagnostics is starting.
Alternative Startup Methods for Intel Macs:
If the ‘D’ key method doesn’t work, try these alternatives for Intel-based Macs:
- Option-D: Restart your Mac and press and hold the Option (⌥) and D keys at startup instead of just ‘D’. This method forces Apple Diagnostics to start over the internet, which can be helpful if the diagnostic partition on your local drive has issues.
- Startup Key Guidelines: If neither of the above methods works, consult Apple’s guidelines for using key combinations at startup to ensure you are using the correct timing and key presses.
Network Connection and Language Selection:
In some cases, particularly when using the Option-D method or on older macOS versions, you may be asked to select your preferred language and ensure you have an active network connection. Use the Wi-Fi menu in the upper-right corner of the screen to connect to a Wi-Fi network if needed. A stable internet connection may be required for certain diagnostic tests or to access further support resources.
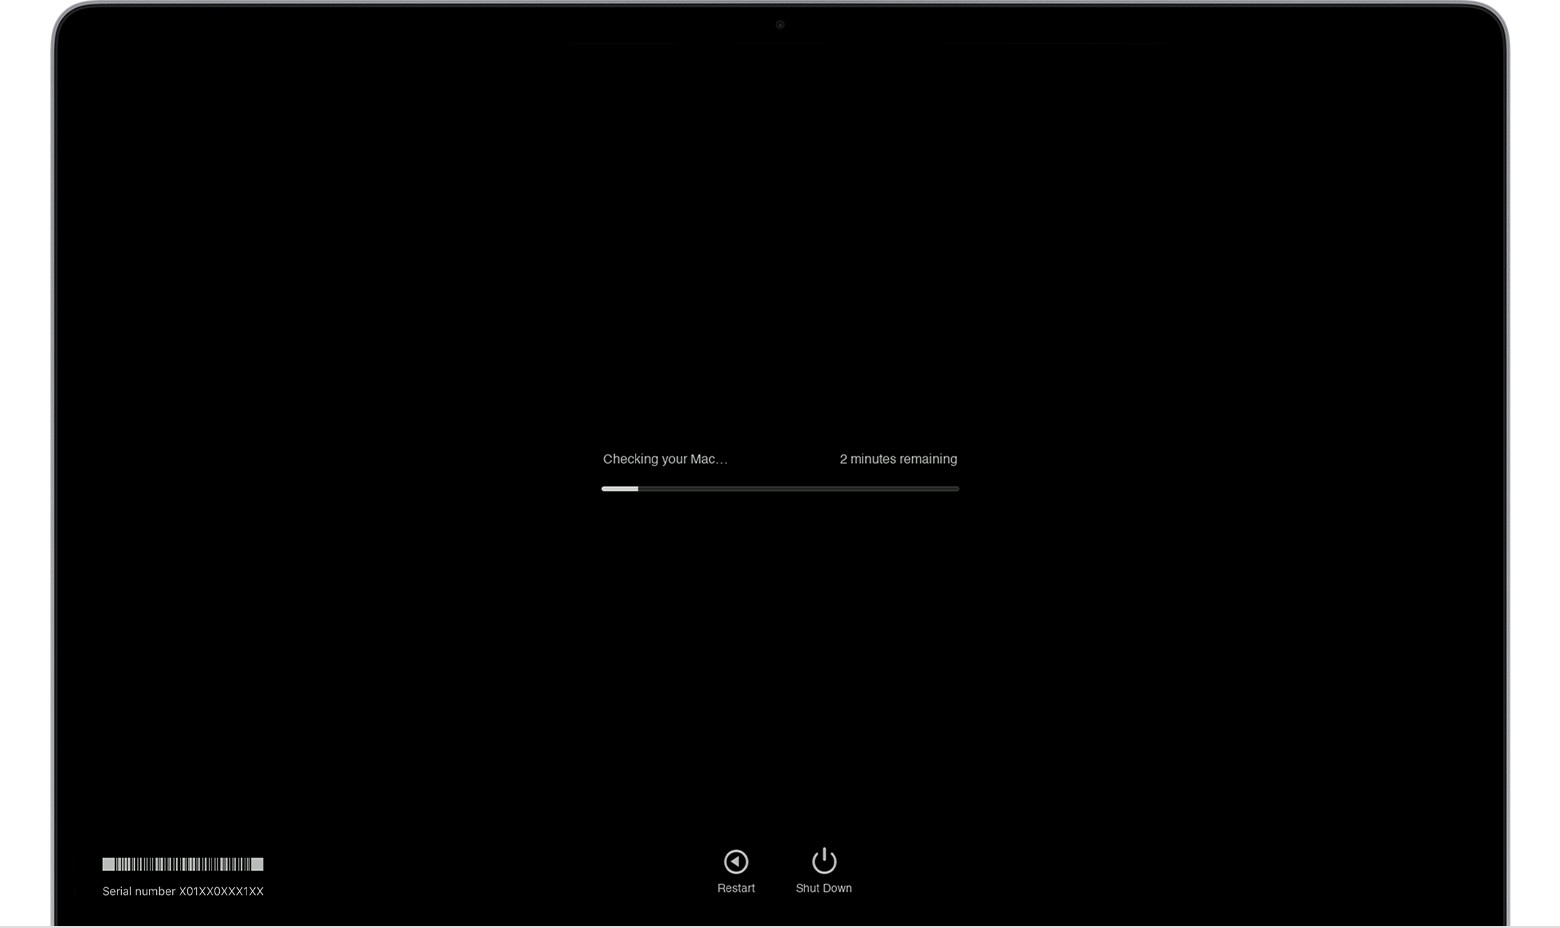
Understanding and Interpreting Apple Diagnostics Test Results
Once initiated, Apple Diagnostics will begin checking the hardware components of your Mac. You’ll see a progress bar on the screen indicating the test is running. The duration of the test can vary depending on your Mac model and the extent of the hardware check.
After the diagnostics process is complete, Apple Diagnostics will display the results. The results will indicate whether any hardware issues were detected. The outcome can be one of two scenarios:
1. No Issues Found: If no hardware problems are detected, Apple Diagnostics will display a “No issues found” message.
2. Issues Found (Reference Codes): If Apple Diagnostics identifies a potential hardware issue, it will display the results along with one or more reference codes. These reference codes are crucial for understanding the nature of the problem.
Reference Codes Explained:
Apple Diagnostics uses reference codes to communicate specific hardware issues. These codes are alphanumeric and provide information about the component that might be experiencing problems. Each code corresponds to a specific hardware category or issue.
To get detailed information about a specific reference code, you can refer to Apple’s comprehensive list of Apple Diagnostics reference codes: List of Apple Diagnostics reference codes. This list will help you understand what each code means and the potential hardware component that is affected.
Actions After Viewing Results:
Regardless of whether issues are found or not, Apple Diagnostics provides you with several options after displaying the results:
- Run the test again: To re-run the diagnostic test, click “Run the test again” or press Command-R. Repeating the test can be useful to confirm initial findings or if you suspect intermittent issues.
- Restart: To restart your Mac normally, click “Restart” or press R.
- Shut Down: To shut down your Mac, click “Shut Down” or press S.
- Get started (Service and Support): If Apple Diagnostics has found issues and you are connected to the internet, you can click “Get started” or press Command-G to explore service and support options. Your Mac will restart and open a webpage with relevant information, potentially including Apple Support contact options or service locations. After reviewing the support information, you can choose to Restart or Shut Down from the Apple menu.
Apple Diagnostics Reference Codes: Your Key to Understanding Hardware Issues
As mentioned earlier, reference codes are a vital part of the Apple Diagnostics results when hardware issues are detected. These codes are not arbitrary; they are systematically structured to pinpoint the category and nature of the potential problem.
For example, a reference code might indicate an issue with:
- Memory (RAM)
- Logic board
- Wi-Fi
- Display
- Storage (Hard drive or SSD)
By consulting the List of Apple Diagnostics reference codes, you can gain a clearer understanding of the problematic component and discuss this information with Apple Support or an authorized service provider for further assistance and repair options.
Published Date: (Original publish date of the source article would be placed here if available)