
Understanding what’s happening under the hood of your car can feel like a mystery, especially when that dreaded check engine light illuminates. Fortunately, with a Can Obd2 Car Scanner Tool, you can demystify those warning signals and gain valuable insights into your vehicle’s health right from your driveway. These user-friendly devices empower car owners to diagnose problems, potentially saving time and money on unnecessary mechanic visits. Connecting an OBD2 scanner is straightforward, and this guide will walk you through the process step-by-step.
Locating the OBD2 Port: Your Car’s Diagnostic Gateway
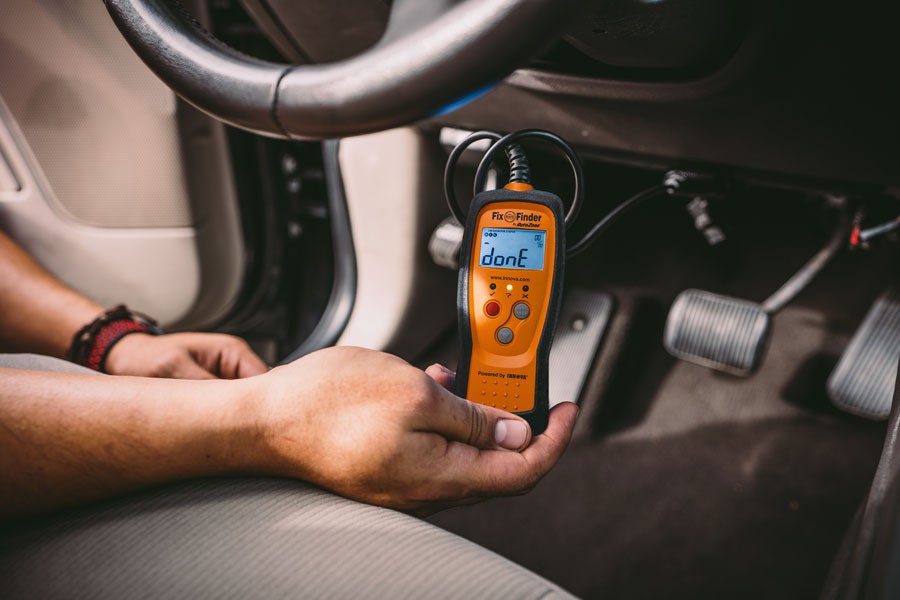
The first step in using your CAN OBD2 car scanner tool is finding the diagnostic port in your vehicle. This port, officially known as the OBDII (On-Board Diagnostics II) port, is a standardized feature in almost all passenger cars and light trucks manufactured since 1996. You’ll typically find it located inside the cabin, underneath the dashboard on the driver’s side.
 OBD2 port location under the dashboard, driver's side
Alt: Locating the OBD2 port beneath the steering wheel in a car, the standard access point for automotive diagnostics.
In some vehicle models, the OBD2 port might be situated in slightly different locations. Don’t be surprised if you find it within the center console or even on the passenger side under the dash. It’s designed as a female 16-pin connector, easily recognizable by its unique trapezoidal shape. Consult your vehicle’s owner’s manual if you are having trouble locating it.
Step-by-Step Guide: Connecting Your CAN OBD2 Scanner Tool
Connecting your CAN OBD2 scanner tool is designed to be intuitive and requires no technical expertise. The plug is designed to fit only one way, ensuring a secure and correct connection. Here’s a simple sequence to follow for a successful connection:
- Turn off the ignition: Ensure your car’s ignition is completely off before you begin. This is a safety precaution and ensures proper communication between the scanner and your vehicle’s computer.
- Connect the scan tool: Take your CAN OBD2 scanner tool and carefully align the male connector with the trapezoidal OBD2 port in your car. Gently push the two connectors together. You might feel a slight resistance, and a gentle wiggle can help ensure they are fully seated and securely connected.
- Turn the ignition to the “ON” position: Turn your car key to the “ON” position. This position powers up your car’s electrical systems, including the OBD2 port, without starting the engine.
- Wait for the scanner to power up: In most cases, the OBD2 port will provide power to your CAN OBD2 scanner tool, eliminating the need for batteries. Allow a few moments for the scanner to complete its boot sequence and initialize.
Once powered up, your CAN OBD2 car scanner tool will typically guide you through any additional steps or information it requires. This might include prompting you to input your vehicle’s information, such as engine size, Vehicle Identification Number (VIN), or asking whether to start the engine for certain tests.
Navigating the Menu: Unlocking Your Scanner’s Features
After successfully connecting your CAN OBD2 scanner tool and it has booted up, you’ll be greeted with a menu of options. The complexity of this menu can vary depending on whether you are using a basic code reader or a more advanced professional-grade diagnostic tool. However, most CAN OBD2 scanner tools will offer some or all of the following core functionalities:
- Read Codes: This is the primary function for diagnosing issues. Selecting “Read Codes” instructs the scanner to communicate with your car’s computer and retrieve any stored Diagnostic Trouble Codes (DTCs). These codes are numerical identifiers for specific problems detected by your vehicle’s onboard systems. The scanner may also provide a brief description of the fault associated with each code. If multiple codes are present, the scanner will typically scroll through them all.
- Erase Codes: Once you have addressed the issue indicated by a DTC, the “Erase Codes” function allows you to clear these codes from your car’s computer memory. This will also turn off the check engine light if it was illuminated due to the fault. Most scanners will prompt you to confirm this action to prevent accidental code clearing. It’s important to note that erasing codes without fixing the underlying problem will only temporarily turn off the warning light, and it will likely reappear.
- Live Data: For more in-depth diagnostics, the “Live Data” or “Data Stream” function provides real-time sensor readings from various systems in your car. This allows you to monitor parameters like engine temperature, oxygen sensor voltage, RPM, and more, as they change while the engine is running. This feature is invaluable for identifying intermittent issues or diagnosing sensor malfunctions by observing live data streams and identifying values that are outside of normal operating ranges.
- Freeze Frame: This feature captures a snapshot of crucial sensor data at the precise moment a DTC was triggered. “Freeze Frame” data provides valuable context and can help pinpoint the conditions under which a fault occurred, aiding in diagnosis, especially for intermittent problems.
- Vehicle Info: This option typically displays basic information about your vehicle, such as the VIN, and other build-related data stored in the car’s computer.
- I/M Readiness: “I/M Readiness” stands for Inspection and Maintenance Readiness. This section is particularly useful for emissions testing or smog checks. It displays the status of various emissions-related systems, indicating whether they are ready for testing or if any faults are present that could cause a test failure.
Navigating the menu on your CAN OBD2 scanner tool is usually done using buttons on the device itself. Even Bluetooth or Wi-Fi enabled scanners, which connect to smartphones, will often have basic buttons for navigation. Arrow keys allow you to scroll through menu options, a select or enter button confirms your choice, and a back button allows you to return to the previous menu.
Deciphering Diagnostic Trouble Codes (DTCs): Understanding Car Language
When you use the “Read Codes” function on your CAN OBD2 car scanner tool, it will display a series of codes that might seem cryptic at first glance. These DTCs, however, follow a standardized format that makes them decipherable. A DTC is always structured as one letter followed by four numbers, for example, P0301.
The initial letter of the DTC provides the first level of categorization, indicating the primary system where the fault is located:
- P (Powertrain): This signifies issues within the powertrain system, which includes the engine, transmission, fuel system, and emissions control systems. Powertrain codes are the most common type encountered.
- B (Body): Body codes relate to systems within the car’s body, such as the airbags, power windows, interior lighting, and other comfort and convenience features.
- C (Chassis): Chassis codes indicate problems with chassis-related systems, including the anti-lock braking system (ABS), traction control, suspension, and power steering.
- U (Network or Undefined): “U” codes point to communication or network-related issues within the vehicle’s computer systems. These can sometimes be more complex to diagnose.
The subsequent numbers in the DTC provide more specific information about the fault. The first number following the letter is always either a “0” or a “1”:
- 0: Indicates a generic code. Generic codes are standardized across all vehicle manufacturers, meaning a P0301 code will generally have the same meaning regardless of the car brand.
- 1: Signifies a manufacturer-specific code. These codes are defined by the individual car manufacturer and provide more detailed information specific to that brand’s systems.
The third digit in the DTC further refines the system identification. For powertrain codes (P-codes), the third digit has the following general meanings:
- 1: Fuel and air metering systems.
- 2: Fuel and air metering – injector circuit.
- 3: Ignition system or misfire.
- 4: Auxiliary emission controls.
- 5: Vehicle speed control and idle control system.
- 7, 8, 9: Transmission-related codes.
- A, B, C: Hybrid-specific codes.
The final two digits (fourth and fifth) provide the most specific identification of the component or circuit that is experiencing the fault. There are hundreds of possible combinations, allowing for very detailed fault descriptions.
Let’s revisit our example code, P0301. Breaking it down:
- P: Powertrain system.
- 0: Generic code.
- 3: Ignition system or misfire.
- 01: Specific fault related to cylinder #1.
Therefore, P0301 indicates a generic powertrain code related to the ignition system, specifically pointing to a cylinder #1 misfire. With this information, a car owner can begin to investigate potential causes of a cylinder #1 misfire, such as spark plugs, ignition coils, or fuel injectors.
Saving Money and Time: The Benefits of Using a CAN OBD2 Scanner Tool
Investing in a CAN OBD2 car scanner tool offers several ways to save money and time on car maintenance and repairs.
Firstly, when your check engine light comes on, or you experience a performance issue, a quick scan with your OBD2 tool can provide an initial diagnosis. While it may not pinpoint the exact problem, it gives you a crucial starting point for investigation. Knowing the DTC allows you to research potential causes and solutions before even visiting a mechanic, potentially avoiding misdiagnosis and unnecessary repairs.
Secondly, an OBD2 scanner helps you determine your vehicle’s readiness for smog checks or emissions tests. The “I/M Readiness” function can reveal if any emissions-related faults are present that could lead to test failure. Addressing these issues beforehand ensures you pass the test the first time, avoiding retest fees and potential penalties.
Finally, by empowering you to diagnose and sometimes even fix minor car problems yourself, a CAN OBD2 car scanner tool can save you significantly on both diagnostic and repair costs at auto repair shops. For example, if a scan reveals a P0138 code indicating a high voltage issue with the bank 1 sensor 2 oxygen sensor, you can research this specific code, learn that it often points to a faulty oxygen sensor, and potentially replace it yourself as a DIY repair. After replacing the sensor, you can use your OBD2 scanner to clear the code and verify the repair, all without incurring labor charges at a shop.
Ready to take control of your car’s diagnostics? Explore the range of CAN OBD2 scanner tools available at carw.store and equip yourself with the power to understand your vehicle better and save money on car repairs.